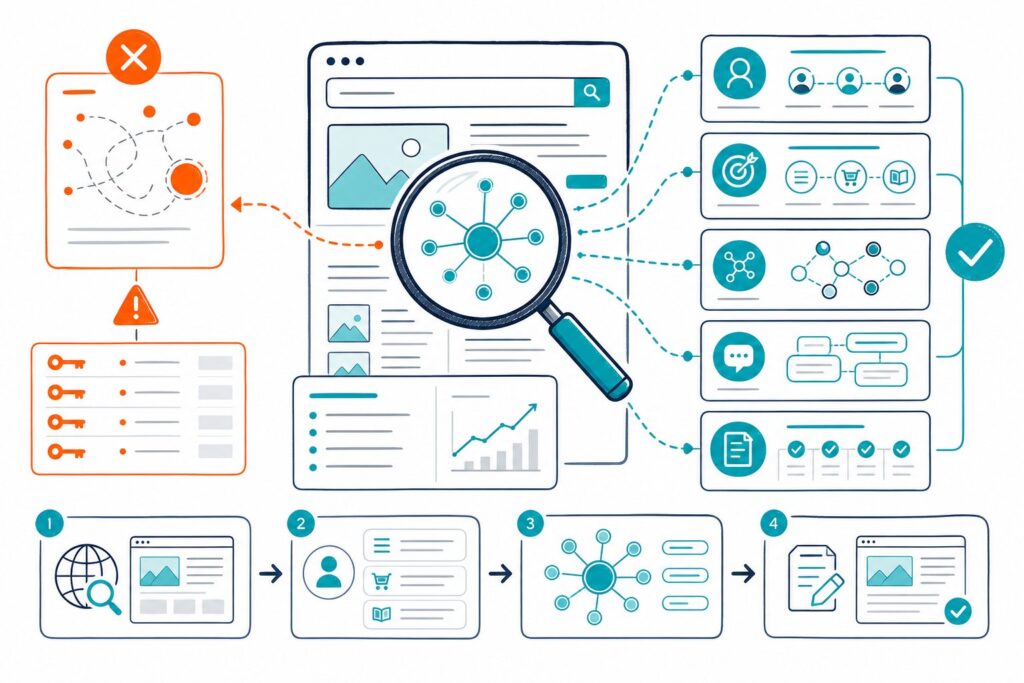
Chrome extensions really shine when you need to check out a live URL right in front of you. Honestly, nobody wants yet another dashboard. The best Chrome extensions for SEO let you peek at rendered HTML, metadata, headings, redirects, links, schema, and search-result context as you work on production pages, staging URLs, or even those annoying authenticated CMS previews.

No extension can spill Google’s secret sauce or do a full crawl for you. But you can use them to check what’s visible, build a solid hypothesis, make a change, and then track clicks, impressions, CTR, and average position in Google Search Console. That’s really where the magic happens.
1) Check Page SEO
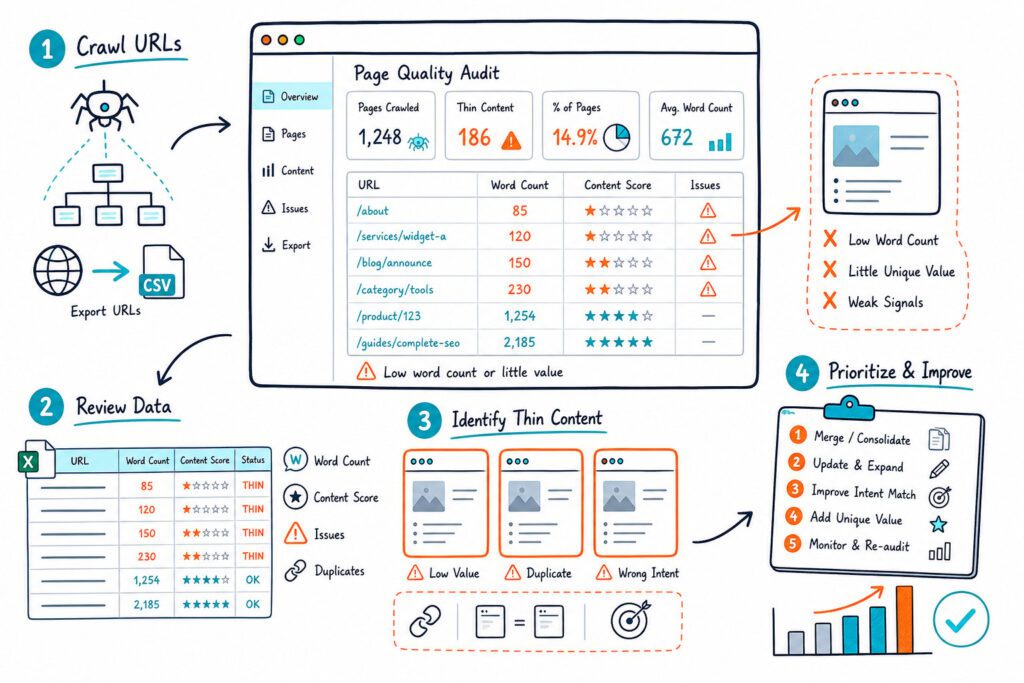
Check Page SEO really comes through when you want a practical audit of the page you’re looking at, even if it’s behind a login or on a staging site. You can dig into rendered headings, metadata, canonicals, robots directives, links, images, schema, content depth, and all sorts of page-level technical stuff, with no need to copy URLs into another tool.
Its best trick? You can compare your page side-by-side with a competitor and pull in Search Console data like clicks, impressions, CTR, position, and ranking queries from your own properties. That makes it way easier to spot a page with tons of impressions but a weak title or a section that’s just too thin. Maybe the content just doesn’t match what people want. That is fixable. there, fixed that.
Don’t treat its scores as gospel or Google ranking factors. The free version covers all the basics, while reports, comparisons, AI prompts, and local data use credits. You can Download the Check Page SEO Chrome extension when you need a live URL audit workflow.
2) Detailed SEO Extension
Detailed SEO Extension gives you a quick, no-login-needed check for all the basics during QA. You can see title tags, meta descriptions, canonicals, robots directives, headings, hreflang, structured data, and the usual crawler files, all from one tidy panel.
I like to use it early on, right after figuring out the target query and before messing with copy. It’s especially handy during staging to catch sneaky noindex tags, canonicals aimed at production, or a missing H1 before you hit publish.
But don’t expect it to go deep. There’s no Search Console context, no competitor-gap analysis, and you won’t see if the page actually satisfies the query. It’s for technical confirmation. Then you’ll want to check the rendered content and performance data somewhere else.
3) Ahrefs SEO Toolbar
Ahrefs SEO Toolbar slides right into your workflow when you need SERP context, quick on-page checks, and link data while scoping out competitors. You can check HTTP headers, redirects, broken links, page elements, and even switch search locations for SERP research.
If you’ve got an Ahrefs subscription, you’ll see Domain Rating, URL Rating, backlink data, estimated organic traffic, and ranking info right in your browser. Just remember, those are Ahrefs’ estimates, not Google’s numbers.
The free features still help with page inspection, but you’ll need a paid plan for the fancier metrics. I like to use it after finding a relevant competitor’s page, not as an excuse to copy every heading from the top result.
4) SEO Minion
SEO Minion is a lightweight tool that’s great for checking headings, links, hreflang tags, and broken links on a single URL. Its SERP preview lets you see how a title and meta description might look before you go live, which can save some embarrassment.
It’s best during a focused content or technical sweep. I’ll export a page’s links, check if key internal links are followed, and make sure hreflang tags point to legit alternates.
It doesn’t give you a full search-performance baseline or any rendered-DOM content-gap stuff. Think of it as a utility extension for quick spot checks, especially handy when you’re jumping between URLs during a client call.
5) Redirect Path
Redirect Path is your go-to when you need to check HTTP status codes and redirect chains. If you’re changing URLs, moving content, updating canonicals, or troubleshooting indexation, this extension shows if a request lands on a 301, 302, meta refresh, or JavaScript redirect.
Run it before and after you deploy a redirect. Test the first URL, every hop, and the final destination. Make sure you get a clean 200 status at the end. Redirect chains just slow things down and make crawling messy, especially if internal links still point to old URLs.
It’s pretty focused and won’t tell you if your destination page matches search intent or has enough content. Pair it with a rendered-page audit and Search Console for the full picture.
6) META SEO Inspector
META SEO Inspector helps you spot metadata you’d probably miss in a normal browser view. You can review title tags, descriptions, canonical tags, Open Graph data, robots directives, structured data, and other HTML details.
It’s useful for developers and SEOs checking template changes across different page types. A quick look can reveal duplicate metadata, broken canonical tags, missing social tags, or conflicting directives from a CMS plugin. That kind of stuff sneaks in all the time.
Use it for code-level confirmation. It won’t tell you if the title fits search intent or if you’ve covered the topic well enough. You’ll still want to review the visible page, headings, internal links, and performance data for that.
7) Link Redirect Trace
Link Redirect Trace is super handy when you’re auditing outbound links, affiliate links, internal redirects, or link placements. You can follow the full path from a clicked link to its final destination and check attributes like nofollow, sponsored, and ugc.
Use it when you spot unnecessary hops in a link audit or need to confirm a paid placement is marked right. For internal SEO, check if important navigation and contextual links go straight to a 200 URL instead of a redirected old path.
It’s not a full internal-link crawler, but it’s perfect for checking high-value links on a page or reviewing a sample after a site release.
8) View Rendered Source
View Rendered Source lets you compare the server’s HTML with the DOM that Chrome sees after JavaScript runs. This matters a lot on React, Next.js, Vue, and other JavaScript-heavy sites, where rendered content, canonicals, meta tags, or structured data might change after the initial load.
Use it if a page looks fine in the browser but fails an indexability or metadata check. You can see if critical content appears in the initial HTML, gets injected after rendering, or just doesn’t show up at all.
This extension does need some technical judgment. Google can render JavaScript, but delays, blocked resources, and inconsistent code still cause headaches. Use the comparison to spot issues, then double-check important URLs in Google Search Console’s URL Inspection tool.
9) Keyword Surfer
Keyword Surfer is great for query research since it adds keyword ideas and estimated search data right into Google results. You can spot modifier patterns, related searches, and get a rough sense of what kind of content’s already ranking.
I use it at the intent stage: search your target query, see what kind of results dominate (guides, category pages, tools, local results, products), and then map your URL to fit that need.
The data is more directional than precise. Search volume estimates don’t beat your own Search Console data, and competitor word counts won’t tell you how long your page should be. Use it to find topics worth digging into, not as a reason to stuff keywords everywhere.
10) MozBar
MozBar still comes in handy for quick authority and link-type checks while you’re looking at search results or prospecting for links. You can see Domain Authority, Page Authority, and highlight followed, nofollowed, internal, and external links.
It’s good when you want a fast look at potential outreach sites or competitor link profiles. It helps you sort opportunities before you do a deeper dive, especially when you need to eyeball relevance, page quality, and link placement by hand.
Domain Authority is Moz’s metric, not Google’s. Don’t let it be the only reason you chase a link. Paid Moz features give you more data, but the free version is fine for basic checks. Keep it turned off when you’re not prospecting. Toolbars can slow down your browser.
How To Choose An SEO Chrome Extension Stack
Start With The Individual URL Workflow
Pick your tools based on your workflow: figure out intent, check the live page, validate crawlability, compare a competitor, and then measure results. A tight stack beats a browser cluttered with overlapping SEO panels any day.
For most audits, all you really need is one rendered-page auditor, one redirect tool, one code comparison tool, one SERP research tool, and Search Console access. Only add authority metrics if you’re doing link research.
Validate Rendered HTML And Indexability
Don’t stop at what’s visible. Check the rendered DOM, title, canonical, meta robots, HTTP status, internal links, schema, and make sure important content loads without user clicks.
For JavaScript-heavy sites, compare the initial HTML with the rendered output. If your H1, product copy, FAQ, or canonical only show up after client-side rendering, document that risk before you change anything.
Use Data Sources According To Their Limits
Treat extension metrics as ballpark figures. Domain Authority, traffic estimates, keyword volume, SEO scores, and readability grades help you compare, but they’re not Google’s own metrics.
Your own Search Console data is the gold standard for clicks, impressions, CTR, position, and query patterns. Use third-party data to form ideas, then check Search Console to see if your changes actually worked.
Avoid Extension Overload In Chrome
Only keep extensions enabled if you actually use them. Too many SEO overlays slow Chrome, mess with SERPs, eat up memory, and make debugging a pain.
Set up separate Chrome profiles if you work with different clients or environments. Keep your main profile lean for audits and a developer profile for tools that dig into headers, scripts, rendering, and accessibility.
A Page-Level SEO Audit Workflow After Installation
Establish Intent And Search Console Baselines
Start with one URL and a main set of queries. Check if the SERP leans informational, commercial, local, or navigational, then make sure your page format actually matches that intent.
In Search Console, jot down clicks, impressions, CTR, average position, top queries, and the date you plan to make changes. Compare equal time periods before and after your update. Try to match days of the week, too, if you can.
Check Relevance, Accessibility, And Trust Signals
Audit the title, H1, H2s, visible copy, entities, internal anchors, images, schema, canonical, robots tags, and page status as they actually show up. Make sure the first screen tells people what the page offers and answers the main need right away.
Then check trust signals for the page type. You might need author info, first-hand evidence, business details, reviews, policies, prices, or clear contact details. Check Core Web Vitals separately. Extensions give you hints, but they can’t replace real field data.
Compare One Relevant Competitor Page
Pick a competitor that ranks for the same intent, not just the biggest domain on the page. Compare section topics, heading structure, internal links, media, entity coverage, page format, and the evidence they use to back up claims.
Don’t copy their word count or keyword density. Focus on what user need your page is missing. Maybe you need more pricing details, step-by-step instructions, local proof, comparison content, or just a direct answer right at the top.
How to Prioritize Changes and Actually Measure Results
First, stack-rank each fix based on how much impact you expect, how risky it is to implement, and whether you can even test it. Tackle the real showstoppers first, including issues like noindex tags, broken canonicals, redirect loops, missing main content, or messed up structured data.
Try a handful of changes at a time, and jot down your hypothesis before you start. Once Google’s had a chance to recrawl and you’ve got enough impressions rolling in, check the same URLs and query groups in Search Console. If you see more relevant clicks or conversions, keep those tweaks. If something tanks your numbers, don’t be shy. Roll it back. And if you want a quick way to kick off a live audit, you can Add to Chrome for free.